NOTE : This article was published on EndUserSharePoint.com a couple of weeks ago and because of the wonderful feedback I received, I decided to cross-post it here too.
This is the fifth article in a multipart series that is intended to help you create mailing lists for your SharePoint sites or blogs without writing a single line of .NET Code. In the introductory article, I listed the project initiatives, requirements, and objectives. In Part 1, I created a secured backend where we will store the subscribers’ contacts. In Part 2, I configured the ‘Contact’ content type, created a subscription form for the mailing list and did some simple customizations to it. In Part 3, I utilized the thrilling DataFormWebPart to further extend and enhance the subscription form to meet the project requirements. In Part 4, I implemented requirement # 3 by creating a list that comprises the names of all the countries of the world and a lookup field that gets its values from this list.
In the previous article, I encouraged you to read Paul Galvin’s post titled “Email and SharePoint Designer Workflow” if you are new to SharePoint Designer Workflows. The reason I recommended this is that I will get directly into creating and implementing the workflows needed for our mailing list.
It’s a mailing list, why do we need to create workflows?
To answer this question, I will share two questions that I recently received.
Q1: When I connect the subscribers list to Outlook, I get all the contacts (the approved and non-approved) ones. In my case, I need to allow the newsletter administrator to send emails only to the approved contacts. This column has no corresponding one in Outlook, so what could be the solution?
Q2: I have created a view that contains only the approved contacts, is it possible to only synchronize items in a specific view rather than all the list items?
Good questions. I am happy that you’ve been paying attention. And that you concluded I would use the “Connect to outlook” feature to allow list administrators to send e-mails to the mailing list subscribers.
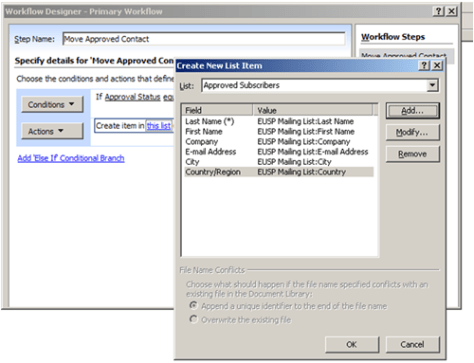
Unfortunately, when connecting a list to Outlook it occurs at the list level, not at the view level. To work around the limitation, I will create a simple SharePoint Designer workflow that moves the approved contacts from the subscribers list to another new list so that this new list will only contain the “Approved Subscribers”.
So this is the first workflow or to be more accurate let us call it the primary workflow. What about the secondary one?
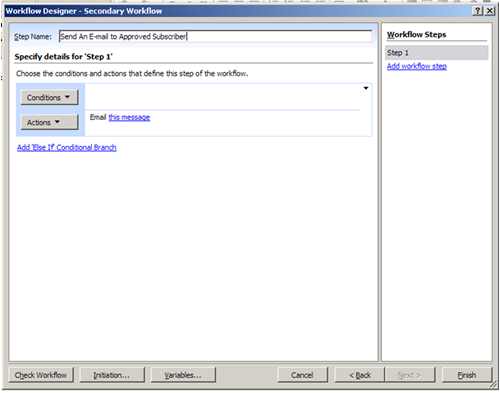
The secondary workflow is very simple; its only purpose is to send e-mails to the subscribers as soon as their request to join the list gets approved (Fifth Requirement).

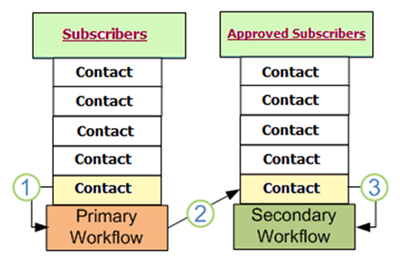
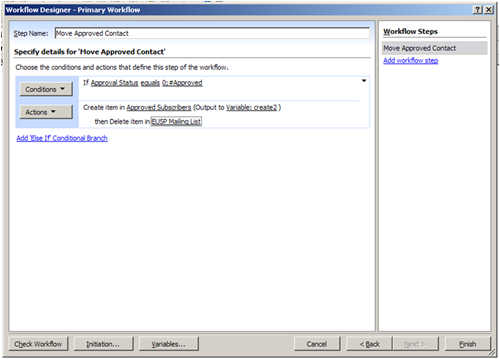
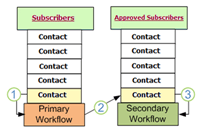
- When the list administrator approves a subscription request, the primary workflow is triggered.
- The primary workflow moves the approved contact to the “Approved Subscribers” list.
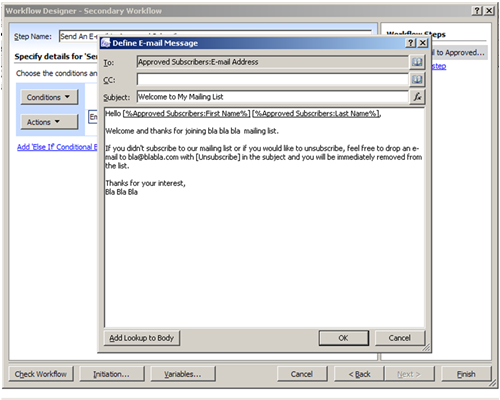
- The addition of an item in the “Approved Subscribers list” triggers the secondary workflow, which in turn sends an e-mail to the requestor.
Note: You need to create another Contacts list and name it “Approved Subscribers”, refer to the first articleif you don’t know how to. Also, note that this list should only be available to the mailing list administrators and not to anonymous users like the first one.
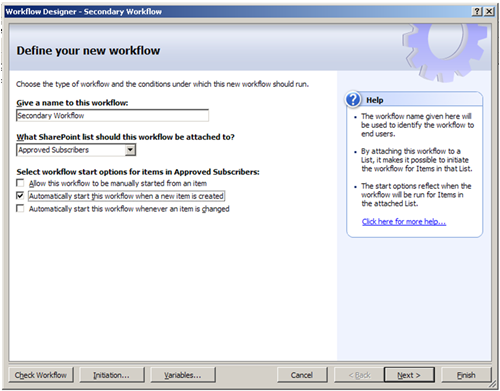
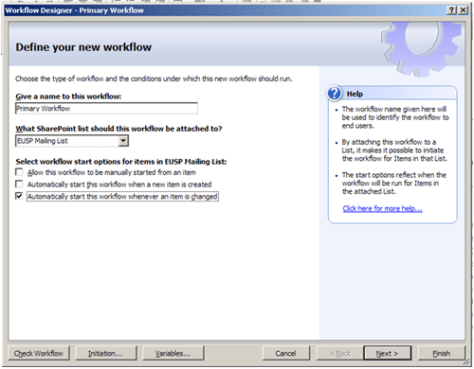
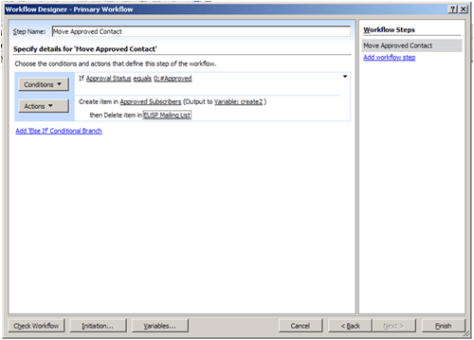
Enough theory, let’s create the primary workflow:
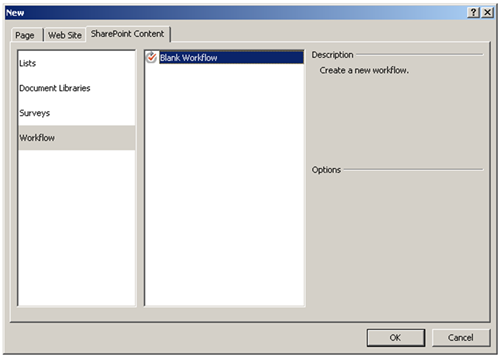
On the File menu, point to New, and then click Workflow and follow the figures bellow.


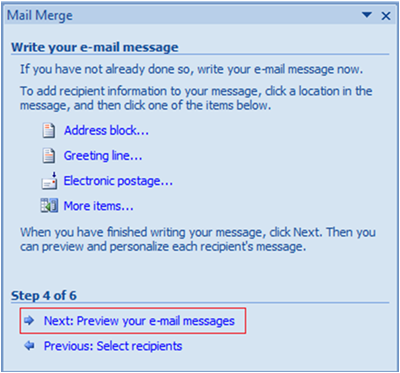
Secondary Workflow to send welcome e-mails to approved subscribers
On the File menu, point to New, and then click Workflow and follow the figures bellow.


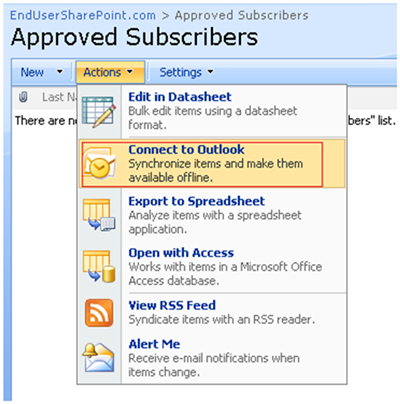
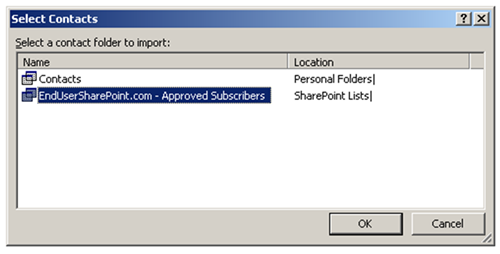
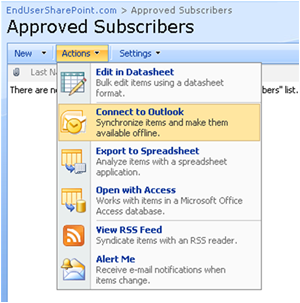
Connecting to Outlook
Now you can connect the “Approved Subscribers” Contacts to outlook and gain all the functionalities provided by it!

Summary
I agree, it was a long journey but it was an interesting one. Iin this article, I just scratched the surface. If you are interested in “SharePoint Designer Workflows”, Bjorn Furuknap has done a terrific job putting together a comprehensive issue from Understanding SharePoint Journal to discuss Business Process Automation using SharePoint Designer Workflows.
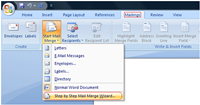
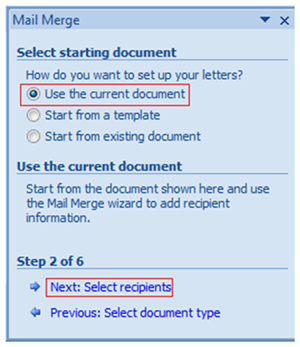
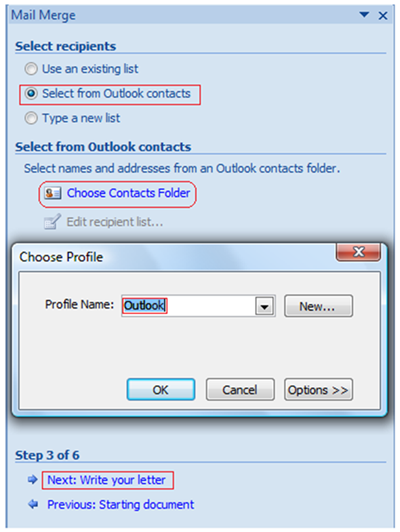
In the next and the last article in this series, I will explain how to administer the mailing list and how to integrate it with Microsoft Word. Stay tuned for this article; it is the most interesting one in the series.
So until I talk to you again, check out my blog at http://www.aymanelhattab.com , where you will find shorter articles, tips and tricks, questions and answers, and downloadable content. You can also follow me on Twitter http://www.twitter.com/aymanelhattab or drop me an e-mail atayman.elhattab@gmail.com if you have any questions.
About EndUserSharePoint:
EndUserSharePoint.com is a community of SharePoint authors dedicated to providing content to SharePoint End Users on three levels: Information Worker, Power User/Site Administrator and Site Collection Administrator.